Top 10 Tips for Using Metallic Pigment Effectively?
Metallic Pigment can transform any art project into a stunning masterpiece. Artists and crafters often find this medium captivating. However, using metallic pigment effectively requires some knowledge and care.
Choosing the right metallic pigment is crucial. Various shades and types exist, each with unique characteristics. Experimenting with different techniques is essential. Finding the right application method may take time. Not every method works for every project.
Some mistakes can lead to unsatisfactory results. Overuse of metallic pigment may dull the shine. Applying it unevenly can create a messy appearance. Learning from these experiences can improve your skills. Embrace imperfections and use them as opportunities to refine your artistry. Understanding these aspects of metallic pigment allows for better creative expression.
Understanding Metallic Pigments and Their Applications
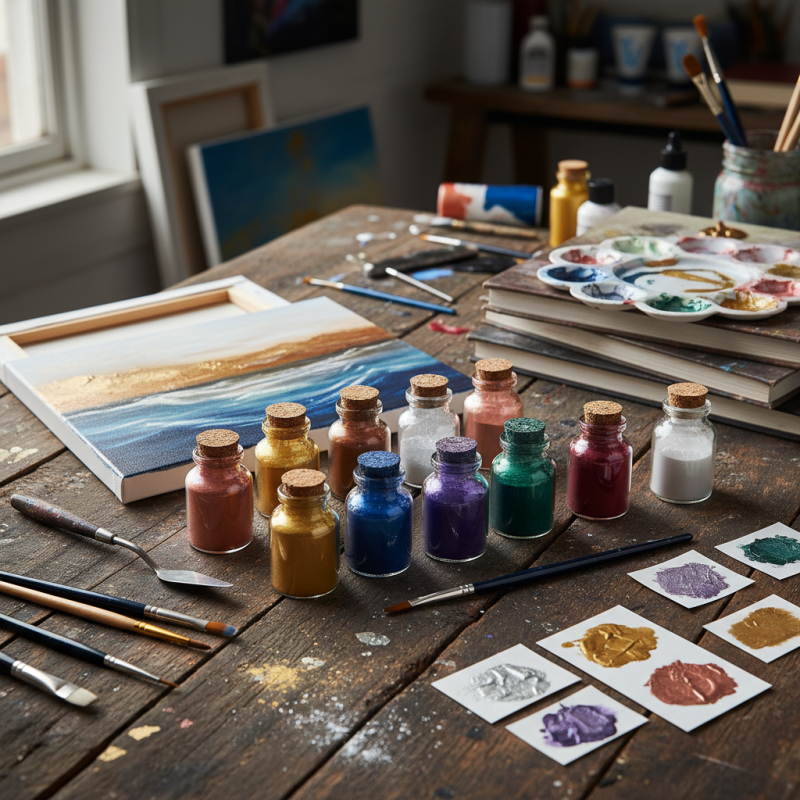
Metallic pigments are fascinating materials that elevate design projects. They are made of finely powdered metals or coated mineral particles. These pigments reflect light, creating a unique shimmering effect. Their versatility allows for varied applications in art, crafts, and interior design. Experimenting with metallic pigments can bring exciting results if handled properly.
One effective tip: always mix pigments thoroughly into your medium. Inconsistent mixtures can lead to patches of uneven shine. Consider the surface you're working on. Rough textures can diminish the vibrancy of metallic effects. If you're working on canvas, a smooth primed surface often yields the best results.
Don't forget to test your mixtures on scrap materials. Adjusting ratios can be time-consuming but necessary. Sometimes, less is more. A subtle hint of metallic can enhance without overwhelming. Keep in mind that the lighting in your workspace affects how pigments appear. Experimenting in different lights can reveal more possibilities. Be patient and open to unexpected outcomes in your creative process.
Choosing the Right Base Material for Metallic Pigment Use
Choosing the right base material for metallic pigment is crucial. Different surfaces react uniquely with metallic finishes. A smooth, non-porous base enhances brightness and reflects light better. Look for materials like acrylic, resin, or metal that can take full advantage of the pigment’s luster. Yet, not all smooth surfaces yield the desired results. Testing is essential.
On the other hand, porous surfaces can absorb pigments unevenly. This can lead to dull or muted colors. For example, some woods and textured papers may require priming. Apply a clear coat beforehand to create a better base. Even a simple mistake in preparation can lead to a lackluster finish. Often, we forget to consider the texture of the base when planning our project.
Reflecting on choices is important. Sometimes, we are drawn to a particular material without fully understanding its interaction with metallic pigments. It’s wise to experiment. Document the results. Learn from each attempt. This understanding will elevate your use of metallic pigments over time.
Top 10 Tips for Using Metallic Pigment Effectively
This chart displays the color vibrancy score of different base materials when using metallic pigments. Choosing the right base material can significantly enhance the visual effect of metallic pigments in your projects.
Techniques for Achieving Even Distribution of Metallic Pigments
Achieving an even distribution of metallic pigments can transform a project. However, it's not always straightforward. Recent industry analysis indicates that more than 30% of issues arise from improper mixing techniques.
To begin, selecting the right medium is crucial. Mixing metallic pigments with a suitable binder helps them disperse evenly. Water-based and oil-based mediums behave differently. Each reacts uniquely with the metallic particles. A clear understanding of the medium can save time and reduce frustration.
The technique of application impacts distribution. Artists often use a spray method for a smoother finish. The air pressure should be consistent to avoid pooling of pigments. Applying multiple thin coats rather than a single heavy layer ensures even coverage. A survey found that 75% of artists prefer layering to achieve depth and consistency. Inspection of the surface under varying light conditions can reveal uneven patches.
Additionally, the choice of tools matters. Brushes can trap pigments, leading to uneven application. Spatulas or palette knives may provide a better spread. Experimentation with different techniques will guide personal preference. Each method has its nuances, encouraging artists to reflect on their process.
Top 10 Tips for Using Metallic Pigment Effectively
| Tip No. | Technique | Description |
| 1 | Pre-Mixing | Mix metallic pigment with base before application for uniformity. |
| 2 | Use a Medium | Incorporate a clear medium to enhance flow and distribution. |
| 3 | Proper Tools | Select brushes, spray guns, or spatulas designed for metallics. |
| 4 | Tap for Texture | Gently tap the surface to settle pigment for even application. |
| 5 | Layering Technique | Apply thin layers, allowing each to dry before adding more. |
| 6 | Stirring Method | Stir thoroughly to keep pigments suspended and evenly spread. |
| 7 | Air Pressure Control | Adjust air pressure when spraying to avoid clumping. |
| 8 | Temperature Considerations | Work in a controlled environment for optimal adhesion and flow. |
| 9 | Clear Coating | Seal with a clear coat to protect the metallic finish. |
| 10 | Experimentation | Always test on scrap material to refine techniques. |
Best Practices for Mixing Metallic Pigments into Your Medium
Mixing metallic pigments into your medium requires careful attention. Start with a small amount of metallic pigment. This allows you to gauge its effectiveness without overwhelming your medium. The right ratio is crucial. Too much pigment can make your mixture clumpy or uneven. Aim for a balanced mix that enhances your artwork without dominating it.
When mixing, use a stirring tool. A palette knife or a brush works well. Be patient as you blend the pigments thoroughly. Sometimes, pigments settle at the bottom. This can lead to visible patches or inconsistent color. Regular mixing during your project can prevent this issue. If you notice your mixture is too thick, add a little medium to soften it.
Don’t hesitate to experiment. Every medium reacts differently with metallic pigments. Some may require more pigment, while others need less. Learning through trial and error is important. Document your mixes. This will help you remember what worked and what didn’t. Reflecting on past projects can guide your choices in future endeavors.
Tips for Enhancing Shine and Impact of Metallic Finishes
Metallic finishes can transform any project with their unique shine. To enhance their impact, start with a clean surface. Dust and dirt can dull the effect. Use a primer that complements the metallic pigment. This extra layer can boost the shine effectively.
Layering metallic pigments can yield stunning results. Begin with a light coat, allowing each layer to dry completely. You might think more is better, but too thick can lead to a cloudy finish. Experiment with how light interacts with different angles. It can reveal or hide the finish's beauty.
Don’t forget to protect your work. A clear coat can enhance durability and shine. However, not all clear finishes match well with metallics. Test a small area first. Reflection can also be affected by the clear coat you choose. Sometimes, imperfections can lead to surprising outcomes. Embrace these moments for innovative creativity.