




Why Choose the Plastic Injection Moulding Process?

Why choose the plastic injection moulding process when many manufacturing methods are available? The answer begins with control. A well-designed mould can produce thousands of identical parts, each matching precise dimensions and surface details. Small clips, medical housings, automotive bezels, and appliance covers all benefit from this repeatability. Cycle after cycle, the machine injects molten polymer into a cooled cavity. The result is fast and consistent production.

John Bozzelli, founder of Injection Mold Consulting, has often stressed, “The mold is the heart of the injection molding process.” That statement deserves careful attention. The machine matters, but poor gate placement or uneven cooling can create warping, sink marks, and weak weld lines. These defects are not cosmetic annoyances. They can affect assembly, safety, and product life. Material selection also changes everything. A glass-filled nylon component behaves very differently from a flexible polypropylene part. Experience helps engineers anticipate those differences before expensive tooling begins.

The process is highly scalable. It can support prototypes, moderate production, and millions of finished components. Automated removal, process monitoring, and recyclable thermoplastics may improve efficiency further. Yet injection moulding is not automatically the cheapest choice. Tooling costs can be substantial, especially for complex cavities or tight tolerances. That limitation should remain visible. A responsible decision compares volume, design complexity, material performance, energy use, and expected service life. This guide examines those factors closely, showing where the plastic injection moulding process delivers genuine value—and where another method may be wiser.
Why Choose the Plastic Injection Moulding Process?

What Is the Plastic Injection Moulding Process?

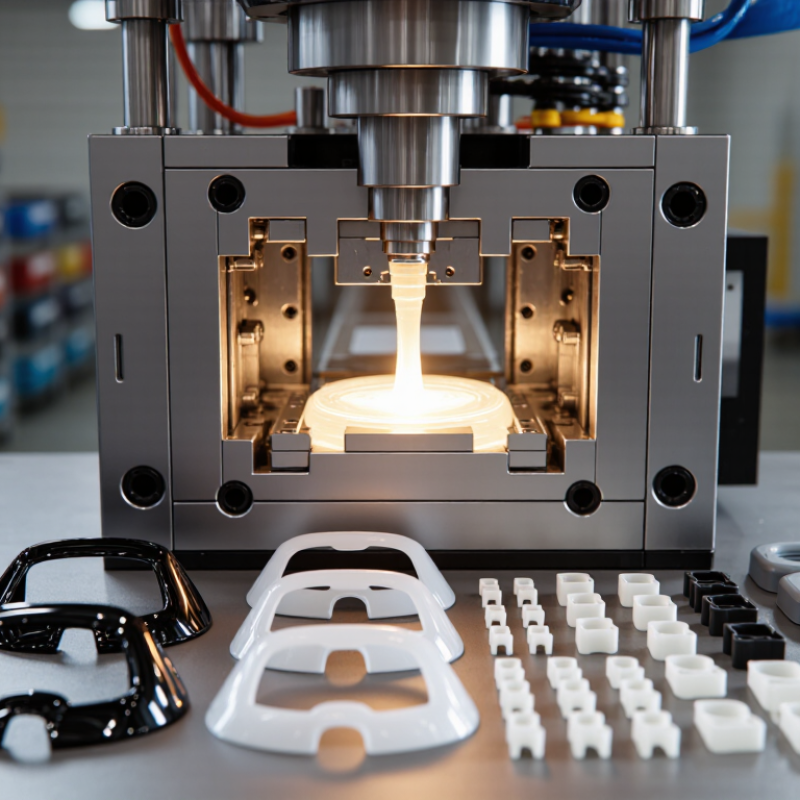
Plastic injection moulding is a manufacturing process for producing repeated plastic parts with consistent shape and detail. It begins with plastic pellets, which are heated inside a metal barrel until they become a controlled melt. A screw then pushes the material through a nozzle and into a closed mould.

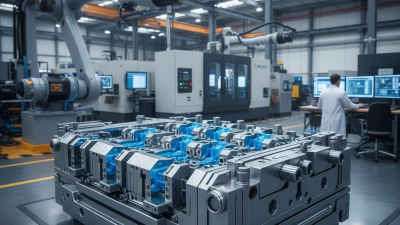
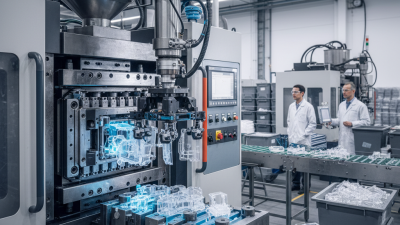
Inside the mould, the plastic fills carefully designed cavities that define the product’s surface, holes, ribs, and edges. Cooling channels remove heat while the part gradually solidifies. After cooling, ejector pins release the finished component. The mould then closes again, allowing the cycle to repeat. A complete cycle may take only seconds, depending on the material, wall thickness, and part size.

Good results depend on more than pressing a button. Engineers must check material flow, shrinkage, cooling time, mould strength, and injection pressure. In practical production, even a small temperature change can cause warping, sink marks, or weak weld lines. These defects are not always visible immediately. A careful operator records process data and inspects samples throughout the run. It is also worth admitting that moulding is not automatically the best choice for every design. High tooling costs can make small production runs inefficient. Poorly planned features may also require expensive mould changes. A design review before tooling can prevent many avoidable problems.

How Plastic Injection Moulding Works Step by Step

Why Choose the Plastic Injection Moulding Process?

Plastic injection moulding turns pellets into repeatable parts through controlled heat, pressure, and cooling. PlasticsEurope’s Plastics – the Fast Facts 2024 reports 413.8 million tonnes of plastics produced globally in 2023. That scale explains its appeal, but volume alone does not guarantee quality. The process begins with dried resin fed into a heated barrel. A rotating screw melts it, meters the shot, and pushes it through a nozzle.

The mould then closes under clamping force. Molten polymer fills each cavity through gates and runners. Sensors monitor pressure and temperature while the material packs against cavity walls. Cooling channels remove heat before ejector pins release the part. Operators inspect flash, sink marks, short shots, and warpage. In practice, the first trial rarely behaves perfectly. A small moisture change can alter dimensions.

Tips: Record resin moisture, melt temperature, injection speed, holding pressure, and cycle time. Use calibrated tools for critical measurements. The ISO 20457 standard highlights dimensional control for moulded plastic parts. Do not trust appearance alone. Fast cycles can hide defects. A slower, stable cycle may reduce rejected parts. Simulation helps, but it can still miss real mould behaviour. A thoughtful trial remains necessary.

Why Choose the Plastic Injection Moulding Process?

Plastic injection moulding is efficient for producing consistent, complex parts at scale. The process combines controlled material heating, high-pressure filling, cooling, and automated ejection in a repeatable production cycle.

This representative 30-second cycle shows that cooling usually takes the largest share of the process because the molten polymer must solidify sufficiently before ejection. Actual times vary according to part thickness, polymer type, mould design, and machine settings.

Which Materials and Products Suit Injection Moulding?

Why Choose the Plastic Injection Moulding Process?

Which Materials and Products Suit Injection Moulding?

Plastic injection moulding suits products made in high, repeatable volumes. Common materials include polypropylene, ABS, polyamide, polycarbonate, and thermoplastic elastomers. Each behaves differently during melting, filling, cooling, and ejection. Material selection depends on strength, flexibility, heat exposure, chemical contact, and surface appearance. A thin electrical housing may need dimensional stability, while a soft grip needs controlled elasticity. Simple shapes are not always simple in production.

Injection moulding works well for enclosures, clips, bottle caps, appliance parts, automotive fittings, and precision connectors. Complex ribs and snap-fits can often be moulded directly, reducing assembly work. However, wall thickness, draft angles, shrinkage, and cooling must be reviewed early. A design that looks efficient on screen may warp after moulding. That is an easy mistake to underestimate. Engineers should test samples before approving large production runs.

Tips

Match the resin to the working environment, not just the purchase price. Check moisture sensitivity before processing polyamide or similar materials. Use consistent wall thickness where possible. Add ribs carefully, because thick intersections may create sink marks. For demanding products, confirm impact, temperature, and chemical resistance through documented testing. A small mould trial can reveal filling problems, weld lines, or ejection damage before they become expensive corrections.

What Are the Main Benefits of Injection Moulding?

Why Choose the Plastic Injection Moulding Process?

What Are the Main Benefits of Injection Moulding?

Injection moulding delivers consistent parts at production scale. Once the mould is properly tuned, each cycle can repeat the same shape, dimensions, and surface details. This consistency supports reliable assembly, especially for housings, clips, medical components, and other close-fitting products. It also reduces manual finishing, which can improve output and control labour costs.

Speed is another practical benefit. Modern machines can complete many cycles within an hour, depending on part size, material, and cooling time. Automated removal and inspection can further reduce handling. Several thermoplastics are available, including materials suited to strength, flexibility, heat resistance, or chemical exposure. Designers can also create ribs, bosses, textures, and thin walls in one moulded part. That may reduce the number of separate components.

Injection moulding is not flawless. Tooling can be expensive, and design errors may remain hidden until testing begins. A poorly placed gate can leave visible marks or uneven filling. Warpage may appear when cooling is not balanced. In production work, careful trials, measurement, and material testing matter more than attractive computer models. Scrap still happens. Even so, stable process settings and routine quality checks can limit waste, while moulds often support large production runs with predictable unit costs.

What Factors Limit the Use of Injection Moulding?

Plastic injection moulding can produce thousands of consistent parts with impressive speed. However, its advantages depend heavily on volume, design, and tooling investment. The mould must be engineered before production begins. Tooling is not cheap. A steel mould may require weeks of machining, testing, and adjustment. For short runs, this expense can outweigh the part price.

Design limitations also influence the decision. Uniform wall thickness helps prevent sink marks, warping, and uneven cooling. Sharp corners may create stress points during ejection. Deep undercuts often require moving mould components, increasing cost and maintenance. Very large parts may need expensive machinery and specialised handling. Extremely thin sections can fill poorly, especially when the material cools too quickly. Engineers can solve many issues, but not every solution is economical.

Material choice creates another boundary. Some polymers need controlled drying before processing, while others demand carefully managed mould temperatures. Small changes in moisture, pressure, or cooling time can affect strength and appearance. Recycled content may support sustainability goals, but it can introduce variation between batches. That trade-off deserves testing, not assumptions. Injection moulding is also less flexible during late design changes. A revised hole or rib may require major tooling work. In practice, teams sometimes approve a design too early, then discover that a minor feature causes serious ejection problems. A prototype method may be wiser before committing to production tooling.